Yet another SSL vulnerability has hit the news – the Poodle SSLv3 vulnerability.
Our servers are already patched against this (we’ve disabled SSLv2 and SSLv3 functionality, and use TLS).
You can check this on the 3rd party site here –
https://www.ssllabs.com/ssltest/analyze.html?d=mail.computersolutions.cn&s=211.144.68.16
Unfortunately this now means that Windows XP and IE6 are no longer supported.
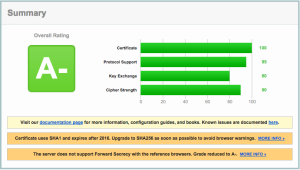
Our rating from the SSLLabs checker is below.
Note that the A- rating is due to our certificate, not our security!
(We can only update that in 2016 when it comes up for renewal).
In January, I upgraded to 100M fibre, and paid upfront for the year (RMB2800).
While I was on vacation, my FTTB at home stopped working, so we called Shanghai Telecom.
What had actually happened was that there was a screwup with the account setup, and they’d put me on a monthly bill *and* 100M.
After 6 months, they decided that I hadn’t paid my bill, and cancelled my 100M fibre account!
Staff eventually sorted it out, and Telecom gave us a 6 month credit.
Even so, I ended up coming back to a crappy E8 wifi + modem setup and my router set to use DHCP.
The Shanghai Telecom unit was setup for a maximum of 16 wifi devices, and uPNP was disabled, sigh.
I prefer to use my own equipment, as I generally don’t gimp it, so I called Telecom to ask for my “new” account details so I could replace it.
Unfortunately the technician had changed the password, and the 10000 hotline didn’t have the new pass, or the LOID.
I called the install technician who’d installed it in my absence, but he wasn’t very helpful, and told me I couldn’t have it. Surprise…
What to do.
I took a look at their modem, and thought it should be fairly easy to try get the details from it.
Did a bit of googling, and found that it had an accessible serial port, so opened up the unit, and connected it up.
After a bit of cable fiddling, got a connection @ 115200 / 8n1
Cable pinout should be –
GND | MISSING PIN | TX | RX | VCC
I’ll add some photos later.
With some more fiddling around, I got terminal access (accidentally!) with some prudent Ctrl C/ Ctrl Z’ing during the boot process as something crashed and I got a terminal prompt.
Its vxware, although the boot process does look quite linuxy.
Lots of interesting commands..
 > ls -al
telnetd:error:341.568:processInput:440:unrecognized command ls -al
 > help
?
help
logout
exit
quit
reboot
brctl
cat
loglevel
logdest
virtualserver
ddns
df
dumpcfg
dumpmulticfg
dumpmdm
dumpnvram
meminfo
psp
kill
dumpsysinfo
dnsproxy
syslog
echo
ifconfig
ping
ps
pwd
sntp
sysinfo
tftp
voice
wlctl
showOmciStats
omci
omcipm
dumpOmciVoice
dumpOmciEnet
dumpOmciGem
arp
defaultgateway
dhcpserver
dns
lan
lanhosts
passwd
ppp
restoredefault
psiInvalidateCheck
route
save
swversion
uptime
cfgupdate
swupdate
exitOnIdle
wan
btt
oam
laser
overhead
mcpctl
sendInform
wlanpower
zyims_watchdog
atbp
ctrate
testled
ipversionmode
dumptr69soap
lan2lanmcast
telecomaccount
wanlimit
namechange
userinfo
localservice
tcptimewait
atsh
option125Mode
eponlinkper
setponlinkuptime
loidtimewait
phonetest
First up, dump the nvram
> dumpnvram
============NVRAM data============
nvramData.ulVersion=6l
nvramData.szBootline=e=192.168.1.1:ffffff00 h=192.168.1.100 g= r=f f=vmlinux i=bcm963xx_fs_kernel d=1 p=0 c= a=
nvramData.szBoardId=      XPT2542NUR
nvramData.ulMainTpNum=0l
nvramData.ulPsiSize=64l
nvramData.ulNumMacAddrs=10l
nvramData.ucaBaseMacAddr=??Umo
nvramData.pad=
nvramData.ulCheckSumV4=0l
nvramData.gponSerialNumber=
nvramData.gponPassword=
nvramData.cardMode=-1
nvramData.cardNo=  000000000000000000
nvramData.userPasswd=telecomadmin31407623
nvramData.uSerialNumber=32300C4C755116D6F
nvramData.useradminPassword=62pfq
nvramData.wirelessPassword=3yyv3kum
nvramData.wirelessSSID=ChinaNet-WmqQ
nvramData.conntrack_multiple_rate=0
============NVRAM data============
Nice, got the router admin pass already.
– nvramData.userPasswd=telecomadmin31407623
(user is telecomadmin).
I actually needed the login details, this turned out to be via
> dumpmdm
This dumped a rather large xml style file with some interesting bits
[excerpted are some of the good bits – the whole file is huge]
Hmm, telnet, and a password!
Telnet is not enabled by default, nor is FTP.
It also had the pppoe user/pass which was what I was looking for, and the LOID, which I needed to stick into my modem.
Score.
While that was pretty much all I needed, I decided to enable Telnet and FTP to play around.
Ok, so how do we enable telnet?
 > localservice
usage:
   localservice show: show the current telnet/ftp service status.
   localservice telnet enable/disable: set the telnet service enable or disable.
   localservice telnetAccess enable/disable: allow access telnet in wan side or not.
   localservice ftp enable/disable: set the ftp service enable or disable.
   localservice ftpAccess enable/disable: allow access ftp in wan side or not.

 > localservice telnet enable

> localservice show
Current local services status:
Ftp Service: Disable
Ftp Allow Wan Access: No
Telnet Service: Enable
Telnet Allow Wan Access: No

> localservice ftp enable

> localservice show
Current local services status:
Ftp Service: Enable
Ftp Allow Wan Access: No
Telnet Service: Enable
Telnet Allow Wan Access: No
 > save
config saved.
reboot the modem, and see if we can login via ethernet
telnet 192.168.1.1
Trying 192.168.1.1...
Connected to broadcom.home.
Escape character is '^]'.
BCM96838 Broadband Router
Login: telecomadmin
Password:
Login incorrect. Try again.
Login: e8telnet
Password:
 >
Cool, so we now have full access to the device.
There also seems to be a remote monitoring system config’d via devacs.edatahome.com, which maps to a Shanghai Telecom ip.
   http://devacs.edatahome.com:9090/ACS-server/ACS
      http://devacs.edatahome.com:9090/ACS-server/ACS
      hgw
      hgwXXXX1563
and something else called itms.
itms
 itmsXXXX5503
I’ve XXX’d out some of the numbers from my own dump, as I suspect its device / login specific.
I got what I needed though, which was admin access to the modem, despite Shanghai Telecom not telling me.
Would really be nice if they just gave you the PPPoE user/pass and LOID, but that would be too easy…
On my modem, the following were the default passwords:
Console Access (via serial port)
User: admin
Pass: v2mprt
Once in console, you can enable Telnet and FTP.
Telnet (not enabled by default)
User: e8telnet
Pass: e8telnet
FTP (not enabled by default)
User: e8ftp
Pass: e8ftp
To show the http password from console (either local, or via telnet).
dumpnvram
url: http://192.168.1.1
http user: telecomadmin
http pass: (as per nvram, mine was telecomadmin31407623 )
Once in you can see all the important bits. Probably easier to grep the xml file from
dumpmdm
Took me about an hour or so to get to that point, I’m running on my own equipment again, and its not gimped. Worth my time!
Had an interesting issue trying to install/upgrade to Mavericks on an Apple 4,1 Mac Pro Desktop.
It was running Snow Leopard, but if I tried to install Mountain Lion or Mavericks it would give a disk error on reboot into the installer.
I made a USB installer, booted off that, and could see that disk utility couldn’t see any drives inside the installer.
As the equipment was working fine on Snow Leopard, this wasn’t a hardware issue.
I updated the firmware on the machine to the latest version, but still the same issue.
Cleared NV ram, same.
Compared SMC revisions, AHCI firmware revisions against a good machine, everything was the same.
Checked dmesg on the machine during a Mavericks installer boot, and could see that it was having issues with wifi, then with SATA.
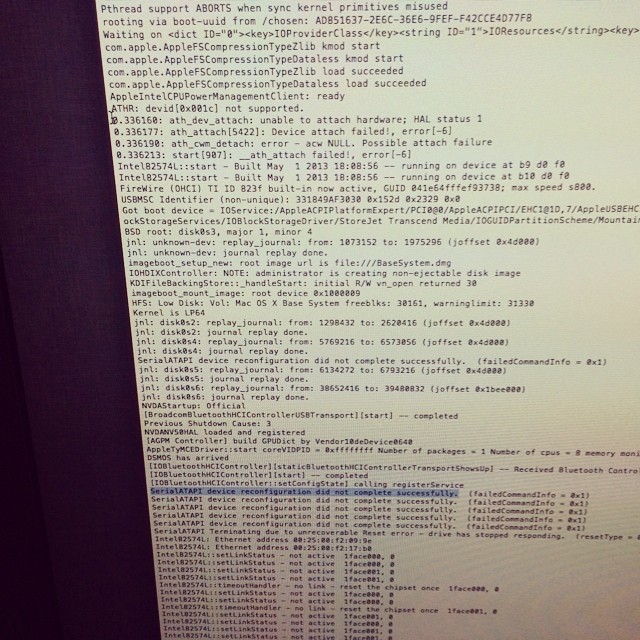
I checked the other machine, and saw that it had a different wifi card. Bingo!
I removed the wifi card from the non-working machine, and rebooted back into the installer, and it could suddenly see the drives again.
My conclusion is that the Intel ACH10 drivers, and the Atheros ARB5X86 drivers conflict with each other in 10.8 and above. I tested in the 10.10 beta too to be sure, and had the same issue.
Something apple needs to sort out, I guess..
Interesting issue, it took me a little while to troubleshoot.
I’ve noticed a little spate of password attack attempts via Roundcube – a webmail program we use for mail over at https://mail.computersolutions.cn
Roundcube does have captcha plugins available which will mitigate this, but users will complain if they have to type in a captcha to login for mail.
Fail2ban provides an easy solution for this.
Roundcube stores its logs in a logs/errors file.
If I take a look at a sample login failure, it looks something like the example below
[09-Jun-2014 13:43:38 +0800]: IMAP Error: Login failed for admin from 105.236.42.200. Authentication failed. in rcube_imap.php on line 184 (POST /?_task=login&_action=login)
We should be able to use a regex like:
IMAP Error: Login failed for .* from
However fail2ban’s host regex then includes a trailing ., and fail2ban doesn’t recognise the ip.
I eventually came up with the overly complicated regex below, which seems to work:
IMAP Error: Login failed for .* from <HOST>(\. .* in .*?/rcube_imap\.php on line \d+ \(\S+ \S+\))?$
Lets add detection for that into fail2ban.
First up, we need to add roundcube into /etc/fail2ban/jail.conf
[roundcube]
enabled  = false
port     = http,https
filter   = roundcube
action   = iptables-multiport[name=roundcube, port="http,https"]
logpath  = [YOUR PATH TO ROUNDCUBE HERE]/logs/errors
maxretry = 5
findtime = 600
bantime = 3600
Note that we are not enabling the filter yet.
Change [YOUR PATH TO ROUNDCUBE HERE] in the above to your actual roundcube folder
eg /home/roundcube/public_html/logs/errors
Next, we need to create a filter.
Add /etc/fail2ban/filter.d/roundcube.conf
[Definition]
failregex = IMAP Error: Login failed for .* from <HOST>(\. .* in .*?/rcube_imap\.php on line \d+ \(\S+ \S+\))?$

ignoreregex =
Now we have the basics in place, we need to test out our filter.
For that, we use fail2ban-regex.
This accepts 2 (or more) arguments.
fail2ban-regex LOGFILE FILTER
For our purposes, we’ll pass it our logfile, and the filter we want to test with.
eg
fail2ban-regex /home/roundcube/public_html/logs/errors /etc/fail2ban/filter.d/roundcube.conf |more
If you’ve passed your log file, and it contains hits, you should see something like this:
Running tests
=============

Use regex file : /etc/fail2ban/filter.d/roundcube.conf
Use log file   : /home/www/webmail/public_html/logs/errors


Results
=======

Failregex
|- Regular expressions:
|  [1] IMAP Error: Login failed for .* from <HOST>(\. .* in .*?/rcube_imap\.php on line \d+ \(\S+ \S+\))?$
|
`- Number of matches:
   [1] 14310 match(es)

Ignoreregex
|- Regular expressions:
|
`- Number of matches:

Summary
=======

Addresses found:
[1]
    61.170.8.8 (Thu Dec 06 13:10:03 2012)
    ...[14309 more results in our logs!]
If you see hits, great, that means our regex worked, and you have some failed logins in the logs.
If you don’t get any results, check your log (use grep) and see if the log warning has changed. The regex I’ve posted works for roundcube 0.84
Once you’re happy, edit jail.conf, enable the plugin.
(set enabled = true), and restart fail2ban with
service fail2ban restart
10
Heartbleed vulnerability
Those of you who follow tech news may have heard about the HeartBleed vulnerability.
This is a rather large bug in SSL libraries in common use that allows an attacker to get unsolicited data from an affected server. Typically this data contains user / password details for user accounts, or secret keys used by servers to encrypt data over SSL.
Once the exploit was released, we immediately tested our own servers to see if we were vulnerable. We use an older non-affected version of SSL, so none of our services are/were affected.
Unfortunately a lot of larger commercial services were affected.
Yahoo in particular was slow to resolve the issue, and I would assume that any users passwords are compromised.
We ourselves saw user/passwords ourselves when we tested the vulnerability checker against Yahoo..
We advise you to change your passwords, especially if the same password was used other sites, as you can safely assume that passwords on other services are compromised.
I also strongly recommend this action for any users of online banking.
There is a list of affected servers here –
https://github.com/musalbas/heartbleed-masstest/blob/master/top1000.txt
Further information about this vulnerability is available here –
http://heartbleed.com/
Looks like Ubuntu 13 has changed the dev id’s for disks!
If you use ZFS, like us, then you may be caught by this subtle naughty change.
Previously, disk-id’s were something like this:
scsi-SATA_ST4000DM000-1CD_Z3000WGF
In Ubuntu 13 this changed:
ata-ST4000DM000-1CD168_Z3000WGF
According to the FAQ in ZFS on Linux, this *isn’t* supposed to change.
http://zfsonlinux.org/faq.html#WhatDevNamesShouldIUseWhenCreatingMyPool
/dev/disk/by-id/: Best for small pools (less than 10 disks)

Summary: This directory contains disk identifiers with more human readable names. The disk identifier usually consists of the interface type, vendor name, model number, device serial number, and partition number. This approach is more user friendly because it simplifies identifying a specific disk.

Benefits: Nice for small systems with a single disk controller. Because the names are persistent and guaranteed not to change, it doesn't matter how the disks are attached to the system. You can take them all out, randomly mixed them up on the desk, put them back anywhere in the system and your pool will still be automatically imported correctly.
So… on a reboot after upgrading a clients NAS, all the data was missing, with the nefarious pool error.
See below:
root@hpnas:# zpool status

pool: nas

state: UNAVAIL

status: One or more devices could not be used because the label is missing

or invalid. There are insufficient replicas for the pool to continue

functioning.

action: Destroy and re-create the pool from

a backup source.

see: http://zfsonlinux.org/msg/ZFS-8000-5E

scan: none requested

config:
NAME STATE READ WRITE CKSUM
nas UNAVAIL 0 0 0 insufficient replicas
raidz1-0 UNAVAIL 0 0 0 insufficient replicas
scsi-SATA_ST4000DM000-1CD_Z3000WGF UNAVAIL 0 0 0
scsi-SATA_ST4000DX000-1CL_Z1Z036ST UNAVAIL 0 0 0
scsi-SATA_ST4000DX000-1CL_Z1Z04QDM UNAVAIL 0 0 0
scsi-SATA_ST4000DX000-1CL_Z1Z05B9Y UNAVAIL 0 0 0
Don’t worry, the data’s still there. Ubuntu has just changed the disk names, so ZFS assumes the disks are broken.
Simple way to fix it is to export the pool, then reimport with the new names.
Our pool is named “nas” in the example below:
root@hpnas:# zpool export nas

root@hpnas:# zpool import -d /dev/disk/by-id nas -f
As you can see, our pool is now a happy chappy, and our data should be back
root@hpnas:# zfs list

NAME USED AVAIL REFER MOUNTPOINT

nas 5.25T 5.12T 209K /nas

nas/storage 5.25T 5.12T 5.25T /nas/storage

root@hpnas:/dev/disk/by-id# zfs list

NAME USED AVAIL REFER MOUNTPOINT

nas 5.25T 5.12T 209K /nas

nas/storage 5.25T 5.12T 5.25T /nas/storage

root@hpnas:/dev/disk/by-id# zpool status

pool: nas

state: ONLINE

scan: none requested

config:
NAME STATE READ WRITE CKSUM
nas ONLINE 0 0 0
raidz1-0 ONLINE 0 0 0
ata-ST4000DM000-1CD168_Z3000WGF ONLINE 0 0 0
ata-ST4000DX000-1CL160_Z1Z036ST ONLINE 0 0 0
ata-ST4000DX000-1CL160_Z1Z04QDM ONLINE 0 0 0
ata-ST4000DX000-1CL160_Z1Z05B9Y ONLINE 0 0 0
errors: No known data errors
Bit naughty of Ubuntu to do that imho…
Many many moons ago, I saw a KickStarter for something that interested me – a motion controller, so I signed up, paid, and promptly forgot about it.
Last week, I got a notice about shipping, and then a few days later Fedex China asked for a sample of my blood, a copy of my grandmother, and 16 forms filled in triplicate so that they could release the shipment.
Luckily we had all that at hand, and after a quick fax or three later we had a unit delivered to our offices. As pictures are better than words, take a look below:
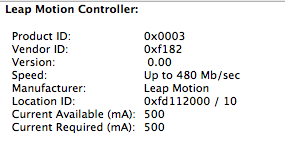
As I’m not really much for reading instructions, I plugged mine in, and saw that it pops up as a standard USB device (well duh, its usb!).
It does need drivers to make it work, so off to http://leapmotion.com/setup I went, to grab drivers.
They’ve definitely spent some quality time making sure that things look good.
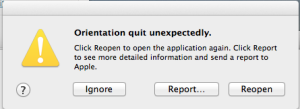
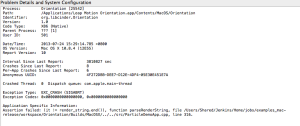
Well, maybe not; it crashed almost immediately!
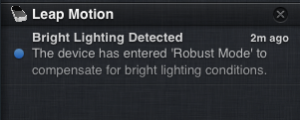
It did popup a message via notifications before it crashed though.
Reopened their app, and it wants me to sign up. Their app is quite buggy – ran the updater, and it also froze, leaving the updater in the middle of the screen. (Software Version: 1.0.2+7287).
I’m *really* not a big fan of that, so off to find some app’s that I don’t have to download from an app store.
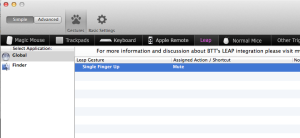
BetterTouchTool http://blog.boastr.net/ has preliminary support for touch ui, so I thought I’d download that first.
Installed BTT, and added some gestures using the Leap Motion settings.
Not much seemed to be happening – my initial settings didn’t seem to make anything happen when i waved my hands over the device, so went back to the Leap settings.
Leap has a visualizer tool which doesn’t work on my Mac – immediately crashes. Probably as I have 3 screens, and they didn’t test very well.
So far, not really a good experience. Consistent repeatable crashing in the Leap software.
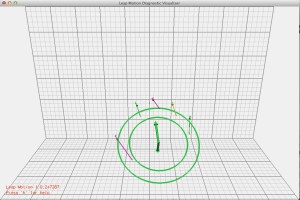
They do have another tool in the settings – Diagnostic Visualizer, which actually does work.
Here it is showing detection of 5 fingers.
I still didn’t have any luck with BTT and Leap, so closed, and reopened both software packages, then stuff started working. Again, this reeks of bugginess…
The BTT app specifically states his is alpha support for Leap, and I’m pretty sure that the initial not working part was not his app…
Now that I finally had it working, how is it?
Well, the placement of the sensor is important. It seems like it doesn’t actually read above the sensor, and the i/r led’s are placed at a 45 degree angle facing you, as when I placed the sensor in front of my keyboard and motion above the keyboard I get better results.
Its extremely flaky though – I can’t reliably get it to detect finger movements. You have to try and retry and retry the same action before it works. Its not quite the swipe your fingers over it and it works that I was hoping for. There is also latency in the motion detection.
Initial detection of fingers in app is about 300-500ms before it see’s them. So a swipe over the sensor doesn’t work unless you sit fingers above it then swipe or perform your action.
This really doesn’t help it.
As placement of the sensor is extremely important, I tried a number of different arrangements, but all were pretty similar in reliability. I honestly get about 20-30% of gestures recognized at best. Even with the Diagnostic visualizer running so I could see what the device thought it was seeing, it was hard to reliable perform actions, even when I sat in its sweet spot. My Kinect is a *lot* better at this than the Leap is.
As it stands, this is little more than a tech demo, and a bad one at that.
If I could persuade one of my staff to video my attempts to use it so you could see, you’d understand!
So, this has a long way to go before its something usable, but I do have hope.
I’m sure that the software will improve, but for now this is definitely a concept piece rather than something usable.
I’m not unhappy that I paid money for it though. The interest in this technology has put a lot of investment capital at the device, and it will improve.
That said, don’t buy…yet.
My rating: 2/10
Addendum – my device gets rather hot in use. Not warm. Hot. Noticeably so. Even in the bare 10-15 minutes I’ve had it running.
Not sure how long it will last in Shanghai summers..
Addendum #2 – seems to have cooled down a bit from the rather hot to the touch that it was running at, although now its stopped working completely.
Dmesg shows –
USBF:	1642989.607	AppleUSBEHCI[0xffffff803bb6a000]::Found a transaction which hasn't moved in 5 seconds on bus 0xfd, timing out! (Addr: 6, EP: 2)

USBF:	1642997.609	AppleUSBEHCI[0xffffff803bb6a000]::Found a transaction which hasn't moved in 5 seconds on bus 0xfd, timing out! (Addr: 9, EP: 2)

USBF:	1649135.492	AppleUSBEHCI[0xffffff803bb6a000]::Found a transaction which hasn't moved in 5 seconds on bus 0xfd, timing out! (Addr: 10, EP: 0)

USBF:	1649141.495	AppleUSBEHCI[0xffffff803bb6a000]::Found a transaction which hasn't moved in 5 seconds on bus 0xfd, timing out! (Addr: 10, EP: 0)

USBF:	1649147.499	AppleUSBEHCI[0xffffff803bb6a000]::Found a transaction which hasn't moved in 5 seconds on bus 0xfd, timing out! (Addr: 10, EP: 0)

USBF:	1649153.503	AppleUSBEHCI[0xffffff803bb6a000]::Found a transaction which hasn't moved in 5 seconds on bus 0xfd, timing out! (Addr: 10, EP: 0)
Unplugged it, and replugged it in, working again, but it looks like both the drivers and the ui side need work. This isn’t production ready by any way shape or means.
Our underlying hardware uses Dell equipment for the most part inside China.
We use Debian as an OS, and Dell has some software available on their linux repo’s specifically tailored for their (often rebranded from other peoples) hardware.
Eg RAC (Remote Access) bits and pieces, RAID hardware, and BIOS updates.
So, enough about why, how do we use their repo?
First add it as a source
echo 'deb http://linux.dell.com/repo/community/deb/latest /' > /etc/apt/sources.list.d/linux.dell.com.sources.list
…then add gpg keys –
gpg --keyserver pool.sks-keyservers.net --recv-key 1285491434D8786F

gpg -a --export 1285491434D8786F | apt-key add -
apt-get update, to make sure that you have the latest repo bits added, then you can install their goodies.
apt-cache search dell will show you whats in their repo. Pick wisely!
18
ZFS bits and bobs
Behind the scenes we use ZFS as storage for our offsite backups.
We have backups in 2 separate physical locations + original data on the server(s), as data is mui importante!
ZFS is a rather nice storage file system that improves radically on older RAID based solutions, offering a lot more funky options, like snapshot’s (where the OS can store have multiple versions of files, similar to Time Machine backups), and more importantly compression.
At some point we’ll be deploying a SAN (storage area network) on a blade server in the data center for data using ZFS, using lots of three and four letter acronyms –
ESXi for base OS, then a VM running providing ZFS storage and iSCSI targets with hardware passthru for other VM’s, then other blades in the server doing clustering.
Right now we’re waiting on an LSI SAS card (see more anacronyms!), so we can deploy…, but I digress.
Back to ZFS.
The ZFS version we use now allows flags, yay!, and that means we can choose alternate compression methods.
There is a reasonably newish compression algorithm called LZ4 that is now supported, and it improves both read and write speeds over normal uncompressed ZFS, and some benefits over compressed ZFS using the standard compression algorithm(s).
To quote: “LZ4 is a new high-speed BSD-licensed compression algorithm written by Yann Collet that delivers very high compression and decompression performance compared to lzjb (>50% faster on compression, >80% faster on decompression and around 3x faster on compression of incompressible data)”
First up check if your zfs version supports it:
zpool upgrade -v

This system supports ZFS pool feature flags.
The following features are supported:
FEAT DESCRIPTION
-------------------------------------------------------------
async_destroy (read-only compatible)
Destroy filesystems asynchronously.
empty_bpobj (read-only compatible)
Snapshots use less space.
lz4_compress
LZ4 compression algorithm support.
Mine does (well duh!)
So…, I can turn on support.
As a note, lz4 is not backward compatible, so you will need to use a ZFS version that supports flags *and* lz4.
At the time of writing nas4free doesn’t support it, zfsonlinux does though, as does omnios, illumos and other solaris based OS’s.
If you aren’t sure, check first with the command above and see if there is support.
Next step is to turn on that feature.
My storage pools are typically called nas or tank
To enable lz4 compression, its a 2 step process.
zpool set feature@lz4_compress=enabled

zpool set compression=lz4
I have nas and nas/storage so I did -
zpool set feature@lz4_compress=enabled nas
zpool set compression=lz4 nas
zpool set compression=lz4 nas/storage
Once the flag is set though, you can set compression on the pools or volume. If you set at the storage volume level, then new pools inherit the compression setting.
Here are my volumes / pools
zfs list

NAME          USED  AVAIL  REFER  MOUNTPOINT

nas          6.09T  4.28T   209K  /nas

nas/storage  6.09T  4.28T  6.09T  /nas/storage
I’ve already set compression on (although it doesn’t take effect till I copy new data onto the pools / volumes).
We can check compression status by doing a zfs get all command, and filtering by compress
zfs get all | grep compress

nas          compressratio         1.00x                    -

nas          compression           lz4                      local

nas          refcompressratio      1.00x                    -

nas/storage  compressratio         1.00x                    -

nas/storage  compression           lz4                      local

nas/storage  refcompressratio      1.00x                    -
If I create a new pool you’ll see it gets created with the same compression inherited from its parent storage volume.
zfs create nas/test

root@nas:/nas# zfs get all | grep compress

nas          compressratio         1.00x                    -

nas          compression           lz4                      local

nas          refcompressratio      1.00x                    -

nas/storage  compressratio         1.00x                    -

nas/storage  compression           lz4                      local

nas/storage  refcompressratio      1.00x                    -

nas/test     compressratio         1.00x                    -

nas/test     compression           lz4                      inherited from nas

nas/test     refcompressratio      1.00x                    -
I’ll copy some dummy data onto there, then recheck.
nas/test     compressratio         1.71x                    -

nas/test     compression           lz4                      inherited from nas

nas/test     refcompressratio      1.71x                    -
Nice!
Obviously, compression ratio’s will depend highly on the data, but for our purposes, most things are web data, mail and other things, so we’re heavy on text content, and benefit highly from compression.
Once we get our SAN up and running, I’ll be looking at whether I should be using rsync still or I should look at zfs snapshots -> zfs storage on other servers.
That though, is a topic for another day.
Rather hacky fix to sort out utf8 latin-1 post issues after export from a rather badly encoded mysql db in wordpress.
UPDATE wp_posts SET post_content = REPLACE(post_content, '“', '“');
UPDATE wp_posts SET post_content = REPLACE(post_content, 'â€', '”');
UPDATE wp_posts SET post_content = REPLACE(post_content, '’', '’');
UPDATE wp_posts SET post_content = REPLACE(post_content, '‘', '‘');
UPDATE wp_posts SET post_content = REPLACE(post_content, '—', '–');
UPDATE wp_posts SET post_content = REPLACE(post_content, '–', '—');
UPDATE wp_posts SET post_content = REPLACE(post_content, '•', '-');
UPDATE wp_posts SET post_content = REPLACE(post_content, '…', '…');
Not recommended, but I had a use for it.
Archives
- November 2024
- November 2019
- October 2019
- August 2019
- April 2019
- February 2017
- September 2016
- June 2016
- May 2016
- September 2015
- August 2015
- June 2015
- April 2015
- December 2014
- October 2014
- September 2014
- July 2014
- June 2014
- April 2014
- October 2013
- July 2013
- May 2013
- April 2013
- March 2013
- January 2013
- December 2012
- October 2012
- August 2012
- July 2012
- June 2012
- May 2012
- April 2012
- March 2012
- December 2011
- November 2011
- October 2011
- September 2011
- July 2011
- May 2011
- April 2011
- March 2011
- February 2011
- January 2011
- December 2010
- November 2010
- October 2010
- September 2010
- August 2010
- July 2010
- June 2010
- May 2010
- April 2010
- March 2010
- February 2010
- January 2010
- December 2009
- November 2009
- October 2009
- May 2009
- April 2009
- March 2009
- February 2009
- January 2009
- December 2008
- November 2008
- October 2008
- September 2008
Categories
- Apple
- Arcade Machines
- Badges
- BMW
- China Related
- Cool Hunting
- Exploits
- Firmware
- Food
- General Talk
- government
- IP Cam
- iPhone
- Lasers
- legislation
- MODx
- MySQL
- notice
- qmail
- requirements
- Reviews
- Service Issues
- Tao Bao
- Technical Mumbo Jumbo
- Things that will get me censored
- Travel
- Uncategorized
- Useful Info
