First my tale of woe:
I just got burgled back home, and they took two of my laptops. One was a small hackintosh Mini9, which I’m not too worried about, but the other was a top of the line IBM Thinkpad which I’d just donated it to my cousin for his studies.
Sadly we didn’t have insurance, and the likelyhood of getting it back is close to zero. I will be watching Gumtree closely though for the next few weeks!
As anyone who owns a laptop can tell you, the most worrying things to worry about are:
The dreaded coffee spill
(only 1 client this month – get those keyboard… er… condoms!)
The whoops I dropped it, now my hard drive is dead / screen is broken
(Too many to mention, you do have backups right?)
and the most dreaded of all…
The oh @#$! I left it in a Taxi. Or if you live in South Africa – someone affirmative actioned it..
While #1 and #2 are relatively easy to recover from (albeit costly), #3 does pose issues.
There are solutions though.
One such solution is one I’d suggested to my brother to install prior to the theft – install Prey. Unfortunately for me he hadn’t done it, doh!
Prey (http://preyproject.com/) is an elegant solution to hardware protection.
Its an install and forget free service that tracks up to 3 computers (more on a paid basis).
How does it work?
You install the Prey software on your computer, and signup for an account (all part of the install).
Their software then silently runs in the background. There are zero options to set, just install, and setup a user account.
Its really set, and forget.
Nothing happens until the computer goes missing – then you can choose from a variety of different useful actions, ranging from taking a photo of the person using the computer (assuming like most laptops these days it has a built in webcam), to monitoring what they’re doing by taking snapshots of the current screen. This is all done silently without the thief knowing that its going on.
This is great for catching them on Facebook, uh Kaixin001 and spotting their user name.
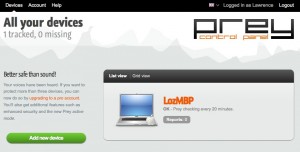
Below is a view of the logged in screen for my current laptop
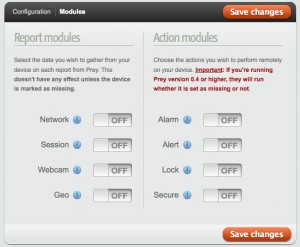
The modules page shows the list of items I can turn on when needed.
The useful ones will be the webcam, and session photo captures. Geolocation is a crapshoot in China, and having the IP info is pretty useless here unless you know someone at China Telecom.
Hopefullly this will be one piece of software that I never use 🙂
Highly recommended for those with expensive equipment that moves around.
Dear Clients,
The government has imposed extended legislation regarding domains and domain hosting in China. As part of these new requirements, we will be required to keep and maintain a set of registration documents for each domain we host.
We will also need to impose a small service fee (300rmb per client for first domain, 100rmb for subsequent domains) for providing assistance with application submission, so that we can cover our costs.
We are now required to do the following for all .CN domains we administer according to Chinese Law.
- Take a color headshot of the contact person of the Applicant Company.This photo must be taken in our office against an official backdrop image.
- Provide:
– A copy of the Certificate of Business License of Legal Entity for the applicant company or a copy of the Certificate of National Organization Code of the applicant company.– A copy of the Chinese Resident Identity Card of the contact person of the applicant company.
Applicants will need to bring the originals to our office so that we can scan them in color in an acceptable format for CNNIC and MII.
- Have the applicant sign/ chop a registration form confirming all information is correct.
- Ensure that your ICP 备案 is up to date and information is correct.
- Verify domain content, and ICP presence on your site.
Note that no personal .CN domain registrations are currently allowed for foreigners.
We are required to submit a valid China business licence, and Chinese ID to the applicable authorities.
If this information cannot be submitted, and your domain url ends in .CN , you will lose your .CN domain..
This information has to be submitted by us to the relevant involved bureau’s (MII, CNNIC, Shanghai Telecom) before the end of October.
We appreciate that this is quite short notice, and urge you to arrange a time to come to our office to fulfil these requirements before the end of October.
We will be updating our ICP and other customer support sites shortly to take into account new requirements.
Mini FAQ
What is a .cn domain?
Any domain that ends in .cn
eg www.computersolutions.cn
www.computersolutions.com.cn
Is this applicable to .com or other domains too?
Yes.
We are required to submit and verify identification information for all domains that we host prior to November 1st.
All clients with domains will need to submit information by coming to our offices with the required information.
Where can I read more about this?
http://www.bakermckenzie.com/RRDomainNameWebsiteRegistration/
http://www.aplf.org/new-regulations-for-registering-domain-names-in-china/
(Note that requirements were extended on October 1st to be applicable for all domains, not just new registrations.)
——-
尊敬的客户,
中国政府发布了关于域名和域名托管的扩展规定。
根据这些最新规定,我们需要为每个托管的域名保留维持一些注册资料。
具体来说,我们需要完成以下所有事务。根据中国法律规定我们管理CN网域。
采集申请公司联系人的彩照一张,照片必须在我们公司使用正式背景图像采集。
-为申请公司提供一份公司法人的营业执照证书复印件或者提供一份申请公司的全国组织结构代码证书复印件。
– 提供一份申请公司联系人的中国居民身份证复印件一份。
-你需带上原始件,以便我们能够彩色扫描为CNNIC 和 MII格式。
申请人需签名确认所有信息的正确性。
请确保ICP备案更新及时,信息准确。
核实网站域名内容和ICP内容。
请注意目前外国客户不允许注册个人CN域名。
我们需向申请局提交合法的中国营业执照和中国居民身份证。
如果此信息不能提交,那么你将失去 CN域名。
该信息需在十月底前由我们提交给相关部门(信息产业部,互联网络信息中心,上海电信)。
我们发布这则简短通知,希望你们安排时间在十月底前来我们办公完成这些要求。
考虑到新规定,我们将会持续更新ICP和其他客户支持站点。
Mini FAQ
什么是cn域名?
任何以.cn结尾的域名
如www.computersolutions.cn
www.computersolutions.com.cn
这个对.com 或其他域名也适用吗?
适用
我们需在11月1日前提交并核实所有托管域名的确认信息。
域名客户需携带所需信息来我们办公室提交。
在哪里能获得更多信息呢?
http://www.bakermckenzie.com/RRDomainNameWebsiteRegistration/
http://www.aplf.org/new-regulations-for-registering-domain-names-in-china/
请注意10月1日新增的要求对所有域名都适用,不只是新注册域名。
One of our clients has a large eLearning website that we maintain.
They’re based out of Bangkok, so they flew me up for some onsite work, part of which culminated in this plugin here.
eFront is a Learning Management System, similar to Moodle.
Its billed as a User Friendly Learning System, although having used it, I’d say thats a bit of a white lie! 🙂
More on eFront here – http://www.efrontlearning.net/
eFrontWPI Plugin Overview
This plugin provides single login functionality for WordPress / BBPress and eFront
It will optionally create an eFront user if one does not exist (option to set this in plugin settings).
For login to function the WordPress user and password must be the same as the eFront username and password.
Plugin is based on the v1 api provided by eFront. Should work with v2 also.
To use the v2 api, simply change the eFront URL to the appropriate URI
IMPORTANT NOTE:
This plugin requires cURL (php5_curl) to be installed as a pre-requisite.
Instructions
Upload this folder into your wordpress / bbpress plugins folder.
Typically ->
[your wordpress folder]/wp-content/plugins/
Activate plugin, then go to eFrontWPI Plugin Settings, and enter the appropriate data:
* eFront URL should be the full URI for the eFront API on your server.
eg
http://www.yourservername.com/eFront/www/api.php
or
http://www.yourservername.com/eFront/www/api2.php
* Admin Login
The eFront Admin user (suggest create a user for the API to use)
* Admin Pass
The eFront Admin user pass
* Create User checkbox
Check if you want a user automatically created.
* Current eFront token
This is a read only field which shows the current eFront API token (if any).
This is a good way to check if the plugin is working – if you have a token, it should be working.
Download here – eFrontWPI v1.0
As I’ve been reasonably successful in the past at figuring out file systems from flat files, I thought I’d have a go at the Dell Mini 3i 1.5 Firmware that surfaced at damipan (http://www.namipan.com/d/DELL_MINI3I_OMS1.5.rar/a5ba3b06ab0bfc9baeb2f09b44f54aa40bac3457ee8ebc04)
The rar file unzips to a MFF file.
This I’m probably guessing is probably named after Marvell File Format or Marvell Flasher File.
Here’s my initial work on the file system of MFF format, based on DELL_Mini3i_OMS1.5.mff
Initial 80 bytes [0x0 – 0x080] (MFF HEADER)
0x00 – 0x03 : 3 Bytes Header MFF
0x03 – 0x07 : Still to figure out, probably file length or crc.
Have to grab another firmware file to check though..
0x08 : Number of files? 9 listed, so quite probably…
Rest of header padded out with zero’s to end of 80 bytes.
[0x80 – 0x180] File Allocation Table
0x80 – our first file. Looks like 0x100 / 256 bytes per file listed, padded with 0x0’s
File listing looks like this:
File header (for each file)
8 bytes, then filename, padded with 0’s to fill 256 bytes length
First 4 bytes – offset in MFF of start of file.
Second 4 bytes – length of file.
Remaining files repeat from next 256 byte intervals.
eg
0x180 – 0x280
0x280 – 0x380
…
[0x80 + 9 files x 0x100 bytes = 0x980] Start of Data.
How did I work this out?
HEADER | Filename (not in hex below as easier to read)
80 09 00 00 34 BB 00 00 | Tavor Flasher_Samsung_ONENAND_h.bin
0x0980 is the start of our first file data, so the first 2 bytes are definitely File Start.
0xBB34 looks quite possibly like File Length.
We can check this easily with one of the plain text files.
Flash_Protection_table.ini is prefixed with 63 EA AD 09 4B 00 00 00
So it should start at 0x09 AD – hmm, readable text starts at offset 9AD D564.
Not quite right. Start offset looks close though.
Lets look at another one.
Tavor_saar_onenand.ini – prefix says
64 d5 ad 09 6f 01 00 00
Ah, 0x9 AD D5 64 is actually our Tavor_saar_onenand.ini content. Cool, a match. So, the first 4 bytes are definitely our location pointer.
Lets look at the Flash protection table again Flash_Protection_table.ini
63 EA AD 09 | 4B 00 00 00
Should start at 09 AD EA 63, and go for 4B length. Bingo, it does 🙂
Our file contents for that area are:
[PROTECTED_REGION_0]
Block_Offset=0x100000
Length=0x20000
Mode=SKIP_BLOCKS
So, now we can start to split the files apart into their associated parts.
factory_BENZ2GWIFI.fbf is probably going to be the most interesting, as its the largest.
That starts at 0xC564, length of 0x09AD1000 and starts with “Marvell_FBF”
Basic math says that 0x9ADD564 (0x09AD1000 + 0xC564) should be our end of file.
Well, it is, as we know flash protection table.ini starts at 9add564.
So, should be fairly easy with that info to write an unpacker tool to rip out the first interior files from the MFF file format.
Some of the files inside are also “packed”, but those appear to be fairly easy to rip apart also 🙂
I’m guessing with a bit more work I’ll be able to replace parts of the firmware with different versions quite soonish.
The file I’m using off of namipan has the following files inside:
TavorFlasher_SAMSUNG_ONENAND_h.bin
TavorFlasher_SAMSUNG_ONENAND_TIM.bin
factory_BENZ2GWIFI.fbf
Tavor_SAAR_OneNAND.ini
factory_BENZ2GWIFI.mff.mlt
magic_fbf.ini
magic_fbf_inner.ini
NTIM_fbw.ini
Flash_Protection_Table.ini
I’m guessing that our fbf file will probably be able to be split into parts as per our ntim_fbw.ini data.
FBF = Flash Binary Format?
some interesting files listed
ntim.bin – non trusted image module?
blob_full.bin – from the borq’s blob gz?
Tavor_M05_Poleg_AI_B0_Flash.bin – tavor = our product chip, as we’re running on a Marvel PXA935 (aka Tavor-P65)
Interesting thing of note – our OEM UniqueID: 0xF00F00 in Unicode is what glyph?
Hint – its not an orange, or a pear 😉
NTIM_fbw.ini
Version: 0x030102
Trusted: 0Issue Date: 0x08142006
OEM UniqueID: 0xf00f00
Boot Flash Signature: 0x4e414e02
Number of Images: 10
Size of Reserved in bytes: 0x40Image ID: 0x54494D48
Next Image ID: 0x4F424D49
Flash Entry Address: 0x0
Load Address: 0x5c008000
Image Size To CRC in bytes: 0x0
Image Filename: NTIM.binImage ID: 0x4F424D49
Next Image ID: 0x4F534C4F
Flash Entry Address: 0x20000
Load Address: 0x5c013000
Image Size To CRC in bytes: 0x0
Image Filename: obm_full.binImage ID: 0x4F534C4F
Next Image ID: 0x5349474E
Flash Entry Address: 0x80000
Load Address: 0x83000000
Image Size To CRC in bytes: 0x0
Image Filename: blob_full.binImage ID: 0x5349474E
Next Image ID: 0x494D4549
Flash Entry Address: 0x00120000
Load Address: 0x84000000
Image Size To CRC in bytes: 0x0
Image Filename: signature_full.binImage ID: 0x494D4549
Next Image ID: 0x4152424C
Flash Entry Address: 0x00100000
Load Address: 0xBFEE0000
Image Size To CRC in bytes: 0x0
Image Filename: reliable_full.binImage ID: 0x4152424C
Next Image ID: 0x47524249
Flash Entry Address: 0x00140000
Load Address: 0xBF600000
Image Size To CRC in bytes: 0x0
Image Filename: arbel_full.binImage ID: 0x47524249
Next Image ID: 0x62746C67
Flash Entry Address: 0x00840000
Load Address: 0xBFF00000
Image Size To CRC in bytes: 0x0
Image Filename: tavor_full.binImage ID: 0x62746C67
Next Image ID: 0x70636C67
Flash Entry Address: 0x00A00000
Load Address: 0xBF300000
Image Size To CRC in bytes: 0x0
Image Filename: bootlogo_full.binImage ID: 0x70636C67
Next Image ID: 0x464F5441
Flash Entry Address: 0x00A20000
Load Address: 0x8F300000
Image Size To CRC in bytes: 0x0
Image Filename: prechangelogo_full.binImage ID: 0x464F5441
Next Image ID: 0xFFFFFFFF
Flash Entry Address: 0x0EA40000
Load Address: 0x80100000
Image Size To CRC in bytes: 0x0
Image Filename: fota_full.binReserved Data:
0x4F505448
0x00000002
0x55415254
0x00000010
0x00004646
0x00000001
0x50524F49
0x00000020
0x00000002
0x00000000
0x00000000
0x00000000
0x00000001
0x00000000
0x5465726D
0x00000008
Flash_Protection_Table.ini
[PROTECTED_REGION_0]
Block_Offset=0x100000
Length=0x20000
Mode=SKIP_BLOCKS
magic_fbf_inner.ini
[INTEL_FLASH_DEVICE_INPUT_FILE]
Number_of_Images=20[IMAGE_HEADER_0]
Start_Address=0xfa00000
Image_Length=0x80000
EraseBlocks=1
WriteImage=0
VerifyWrite=0[IMAGE_HEADER_1]
Start_Address=0xdd40000
Image_Length=0x800000
EraseBlocks=1
WriteImage=0
VerifyWrite=0[IMAGE_HEADER_2]
Start_Address=0xeb40000
Image_Length=0x8c0000
EraseBlocks=1
WriteImage=0
VerifyWrite=0[IMAGE_HEADER_3]
Filename=NTIM.bin
Start_Address=0x00000000
EraseBlocks=1
WriteImage=1
VerifyWrite=0[IMAGE_HEADER_4]
Filename=Arbel_NVM_SAC_NOCOMMRTC.bin
Start_Address=0x00140000
EraseBlocks=1
WriteImage=1
VerifyWrite=0[IMAGE_HEADER_5]
Filename=blob
Start_Address=0x00080000
EraseBlocks=1
WriteImage=1
VerifyWrite=0[IMAGE_HEADER_6]
Start_Address=0x0bd40000
Image_Length=0x02000000
EraseBlocks=1
WriteImage=0
VerifyWrite=0
[IMAGE_HEADER_7]
Filename=opl.img.yaffs
Start_Address=0x0bd40000
EraseBlocks=1
WriteImage=1
VerifyWrite=0[IMAGE_HEADER_8]
Filename=ramdisk_len.img
Start_Address=0x00c40000
EraseBlocks=1
WriteImage=1
VerifyWrite=0[IMAGE_HEADER_9]
Filename=ramdisk-recovery_len.img
Start_Address=0x00cc0000
EraseBlocks=1
WriteImage=1
VerifyWrite=0[IMAGE_HEADER_10]
Start_Address=0x00d40000
Image_Length=0x08000000
EraseBlocks=1
WriteImage=0
VerifyWrite=0
[IMAGE_HEADER_11]
Filename=system.img.yaffs
Start_Address=0x00d40000
EraseBlocks=1
WriteImage=1
VerifyWrite=0[IMAGE_HEADER_12]
Filename=TAVOR_LINUX_NTOBM.bin
Start_Address=0x00020000
EraseBlocks=1
WriteImage=1
VerifyWrite=0[IMAGE_HEADER_13]
Filename=Tavor_M05_Poleg_AI_B0_Flash.bin
Start_Address=0x00840000
EraseBlocks=1
WriteImage=1
VerifyWrite=0[IMAGE_HEADER_14]
Start_Address=0x08d40000
Image_Length=0x03000000
EraseBlocks=1
WriteImage=0
VerifyWrite=0
[IMAGE_HEADER_15]
Filename=userdata.img.yaffs
Start_Address=0x08d40000
EraseBlocks=1
WriteImage=1
VerifyWrite=0[IMAGE_HEADER_16]
Filename=zImage
Start_Address=0x00a40000
EraseBlocks=1
WriteImage=1
VerifyWrite=0[IMAGE_HEADER_17]
Filename=prdcfg.bin
Start_Address=0x00940000
EraseBlocks=1
WriteImage=1
VerifyWrite=0[IMAGE_HEADER_18]
Filename=precharge_logo.out
Start_Address=0x00a20000
EraseBlocks=1
WriteImage=1
VerifyWrite=0[IMAGE_HEADER_19]
Filename=logo_pic.gz.out
Start_Address=0x00a00000
EraseBlocks=1
WriteImage=1
VerifyWrite=0
Lastly, hi to the people at http://www.allphone.com.cn 😉
As I’ve been busy with real life ™, its been a while since I took a trip to the computer mall to see what new goodies I could play with.
A friend is in town from Beijing, so took him down to the Shanzhai hell (or heaven depending on PoV) that is Qiu Jiang lu.
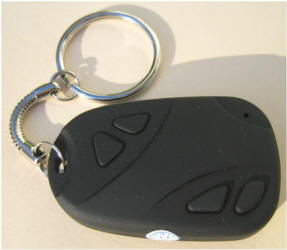
I wasn’t aware that you could buy Keychain video recorders for 80rmb, but you can. Apparently they’re even cheaper in eBay – although I don’t see how its possible, given that the factories here are pricing higher than they sell for in the States. Rejects?
Anyhow, I bought 2 keychain video camera’s, and an MP3 looking one.
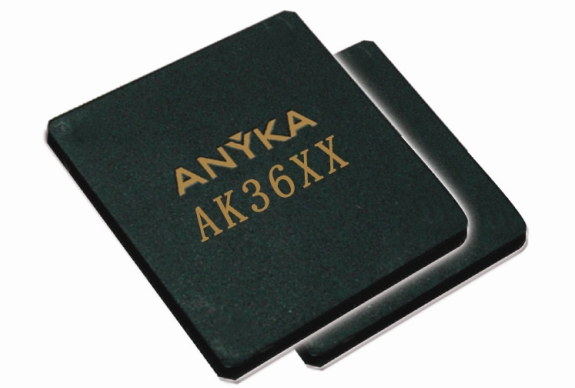
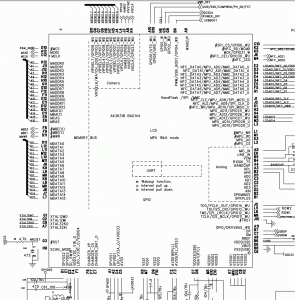
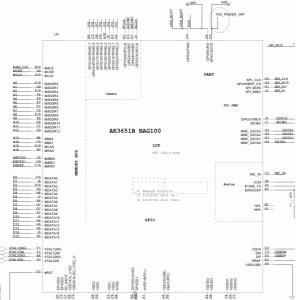
Dissected one and it contains the Anyka AK3651B as the main chip.
The AK36xx series is an SoC (System on a Chip).
As Anyka appears to be deathly afraid of giving out any useful information about their products, I’ve had to piece together info from what I found online.
Their own product page here – http://www.anyka.com/enProShow.asp?sortFlag=110&sortName=Application%20Processor&id=105
says the following:
32-bit Microprocessor Core
Integrated I/D cache
Memory Management Unit (MMU)Video Coprocessor
MPEG4.SP codec
H.263 codec
Motion JPEG codecAudio Coprocessor
MP3 decoder
WMA decoder
AAC/AAC+ decoder
AMR codec
Real-time audio stream in PCM/ADPCM formatImage Coprocessor
JPEG HW codecGlueless Dual LCD Displays
Supporting MPU LCD
Supporting RGB LCD
Programmable LCD size and refreshing rateConnectivity
USB 2.0 HS OTG
I2S master/slave
UART
SPI
MMC/SDEmbedded ADCs and DACs
SAR ADC for touch panel and voltage detect
Sigma-Delta ADC for microphone
Sigma-Delta DACs for stereoBuilt-in Power Amplifier/Headphone Driver
External Memory Support
Supporting SDRAM
Supporting Nand Flash (SLC/MLC, with hardware ECC)Package
LQFP 128-pin/144-pin,FBGA 100-pin/144-pin
Appears that they’re mostly used in MP3/MP4 players, which is why most of my googling on specs was ruined by whiny users asking for someone to please help them with their foobar’d player.
The first useful links on these are at Chuck’s pages here – http://www.chucklohr.com/808/
He’s done a lot of useful work collating information, although some of his deductions are a little strange, so take some things with a pinch of salt. Lots of good info though.
The main source of info on the hardware side is at http://www.readerme.com, they have a most excellent section of downloads which provide more information on the chips than anything else out there!
We gave them a call and had a chat (one of the benefits of being located in China, is that we obviously speak Chinese in the office!).
They don’t speak great Mandarin though – so it was bad cantonesedarin or Mandonese? Hmm, have to come up with a word for that! (similar to Chinglish but mixing Cantonese and Mandarin).
Both sides were laughing but we could at least talk to each other. “Mo man tai, dui ma?”
They actually don’t sell products, they only do design work for others, but, thats good to know.
They did point us in the direction of a few trading companies that could do FOB export, but shipping quantities are in the x,000’s so not so useful yet.
I’ll see if I can find the actual factories making these tomorrow. (Although when I say we, I mean the staff).
They did prove to be an excellent source of data on the chips though if one takes a look at the PDF’s on their site.
The golden data trove is here – http://www.readerme.com/html/html/%E7%9B%B8%E5%85%B3%E4%BA%A7%E5%93%81%E5%8E%9F%E7%90%86%E5%9B%BE%EF%BC%8C%E8%B4%B4%E7%89%87%E5%9B%BE.html
According to Anyka (安凯 in Chinese) the 36xx chips are a series, so they should have similar functionality.
While I don’t have data sheets, or a BSP, I can read the PDF’s at least to get an idea of where things are laid out.
They do look similar, so probably only minor differences in functionality (probably the newer ones are cheaper?).
Again, hard to check, as Anyka datasheets appear to be hens teeth.
I may give them a call also, and see if they’ll be willing to give us some info about their products, but I’m not holding my breath on that one.
I’ve also poked around a bit in the firmware files using strings, and taking a look at headers, and have come up with some preliminary conclusions.
I’m guessing their SoC is ARM5 based, given what i have found (haven’t decompiled yet, but looks like that).
Some common strings in the firmware’s from start:
00000 06 00 00 EA FE FF FF EA
Googling “06 00 00 EA FE FF FF EA” comes up with some other people talking about firmware for pxa312 devices, which have exactly that in their boot loader, so, seems likely.
The PXA312 is ARMv5TE…
I’m guessing some playing around with radare (http://radare.nopcode.org/get/radare.pdf.html) should get some more info about whats going on.
Running strings on the firmware files available shows interesting info:
strings /Documents/Keychain\ Camera/cx311V2.04/Spiboot_36XX.bin
ANYKA362
6KA49
start read cfg
file cnt:%d
file name:%s
Cannot find BIOS
read file info fail
load bios ……
map:%d
file len:%d
ld addr:0x%x
Load bios from spiflash successfuly!
read BIOS fail
spi boot start
system clock: %d
BIOS
Thats our 4k bootloader, which obviously loads our 1M bios image from SPI flash memory (SPI = Serial Peripheral Interface)
More on SPI here.
http://en.wikipedia.org/wiki/Serial_Peripheral_Interface_Bus
Hmm, more reasons for me to get a Bus Pirate now…
We have a flasher also, although its Windows based.
I’m guessing some USB sniffing will lead to some magic byte handshake sequence to get into the bootloader via USB, as the BIOS strings point to that.
eg:
“The setup packet is not 8 byte!”
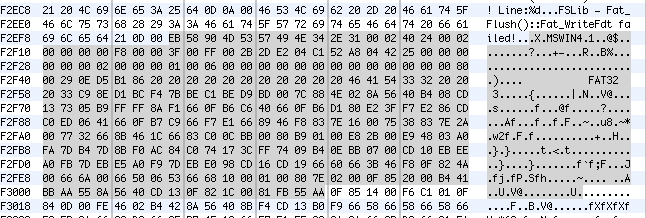
Also amusing is that its fairly easy to find the FAT32 code embedded in at least one of the firmwares
EB xx 90 … -> 55 AA (in Sprint1M.bin)
The flasher tool is also nice enough to give us an idea of layout in the 1M flash chip.
You’ll need to install the Anyka M3 USB driver to talk to the chip, which appears to have the following attributes via USB:
Vendor ID: 0471
Product ID: 0666 (the product of the beast? hehe)
This is a bit naughty, as 0471 is in theory already taken by Philips (or NXP) according to http://www.linux-usb.org/usb.ids
Its also astoundingly obvious that they used driverworks to make the driver. (From the oh so copied in China vid/pid, and the strings left in the driver). An example of this here http://www.baiheee.com/OpenSource/Easy%20USB%2051%20Programer/Easy%20USB%2051%20Programer_DriveOurBoard.htm
Want to bet someone read those instructions and its been repeated ad nauseum?
Sadly, its so easy to see the minimal effort that’s gone into things.
Back to our flasher, it says that our 1M chip is laid out as follows:
###Project Name
project name = chaoxian###Devie Number
device channel = 8###COM
com bOpen = 0
com base = 1
com count = 1
com baud rate = 38400path producer sundance2 = producer_sundance2.bin
path producer sundance2A uboot = producer_sundance2A_uboot.bin
path producer sundance2A umass = producer_sundance2A_umass.bin
path nandboot sundance2= Spiboot_36XX.bin
path nandboot sundance2A= Spiboot_36XX.binbios run addr = 0x30500000
bios start addr = 0xc0000
bios end addr = 0x1c0000
bios backup start addr = 0x1c0000
bios backup end addr = 0x2c0000chip type = AK_3225
chip uboot = 1
chip power off gpio = 255
chip usb2 = 0
chip get aid = 0
chip update = 0
chip select loop = 1
chip select nand0 = 1
chip select nand1 = 1
chip select nand2 = 1
chip select nand3 = 1
chip gpio_ce2 = 255
chip gpio_ce3 = 255ram size = 8
ram row = 12
ram column = 8
ram bank = 4moduleburn DownloadMode = 2
moduleburn bDownloadFLS = 1
moduleburn bDownloadEEP = 1
moduleburn baudrate = 921600
moduleburn gpio_dtr = 85
moduleburn gpio_module_igt = 109
moduleburn gpio_module_reset = 87
moduleburn path_fls = LCG2.fls
moduleburn path_eep = LCG2.eepfs start addr = 0x6c0000
fs reserver block = 64
fs nonfs reserve size = 4partition count = 0
download_to_udisk count = 0
download_to_nand count = 3
download_to_nand1 = 0, Spring1M_bios.bin, 0x30500000, BIOS
download_to_nand2 = 0, Spring.bin, 0x30000000, MMI
download_to_nand3 = 0, AkResData.Bin, 0x0, RESdownload_to_mtd count = 0
nand supported count = 0
If we take a look at that, our Spring1M_bios.bin starts off at C000
(bios start addr = 0xc0000)
(Deduct a 0 as we’re not offset by 0x300000000)
A look in a hex editor at that position shows:
Note the 32bit word value – 0xE1A0C00D
Thats classic ARM, so we _know_ its arm based…
romStart [0xe1a0c00d] mov r12,r13
Our next line of code is exactly the same as listed here http://code.google.com/p/milestone-overclock/wiki/Disassembly
e1a0c00d mov ip, sp
e92dd8f0 push {r4, r5, r6, r7, fp, ip, lr, pc}
So its looking like we can basically disassemble the code using arm-none-linux-gnueabi-objdump
I’ll leave that for another day, but with a bit more work we could compile our own code for this as we now have a good idea of the target cpu.
The next step would be to get into the bootloader or debug mode via USB, and see what can be seen.
Tools used:
0xED – http://www.suavetech.com/0xed/0xed.html
A nice fast and compact hex viewer for OSX.
strings – built into most *nix based systems.
Grey matter – Available to all, unused by many 😉
Now hopefully I can get back to the Webcam firmware stuff as I’ve been promising to do.
Although I was supposed to be on a plane today heading home, I did something silly and got the dates wrong.
So, after a nice scenic trip yesterday evening to the airport and back, I get to do it all over again tonight.
Although that was a total pain, I did get to spend another day in Shanghai, and luckily enough, it coincided with the new Apple Store opening in the IFC center over in Pudong.
Overall impression – this is good!
I spoke with a number of the staff, and talked about the usual issues here (service, service, service…), and they were all quite understanding, and Apple’s genuinely trying to improve on things – hence their own store, and support in Shanghai (finally).
Shanghai has the biggest Genius bar in the world now. Unfortunately the store is a bit lacking compared to others in Shanghai – no iPad, no iPhone (other than the official one), but they do carry software and iMac’s / Laptops in lots of configurations.
I know where my next iMac is coming from 🙂
Downsides of the store – the moat outside is going to claim lots of victims. Its so subtle that you miss is – who’s idea was that?
We already saw unhappy victims with wet feet while we were leaving. I expect that to be changed in the near future, or the store will have to provide a shoe drying facility!
I also had the only iPad in the store (and possibly China at that point) that could play flash. Ok, there were only 2 iPad’s in the store, but still.. 😉
Photo’s of the store on flickr, which I would upload, but China is being finicky again. Grrr
Should be on the sidebar though.
During the research into LCD updating on the T6x IBM’s, I learned a few new things.
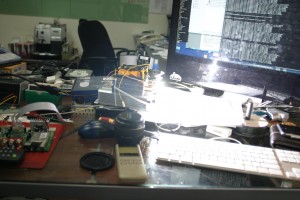
One of those was that I had some of the parts lying around the office necessary to make a projector.
As my office desk typically looks like a mad scientist uses it, I thought I may as well add some more goodies to fill the missing bits.
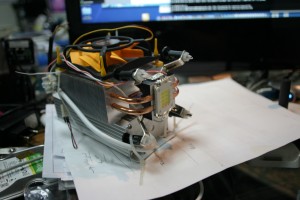
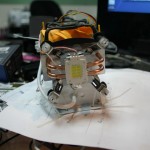
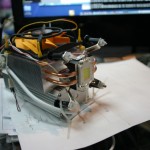
First up was an LED light off taobao. As the 100 watt ones are still a little pricey, I’m going with a 50w one for testing purposes.
Visitors to the office who still have LED driven holes burned into their retina’s agree that yes, it is quite bright.
Probably not bright enough for our purposes, but good enough for testing.
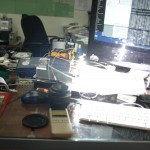
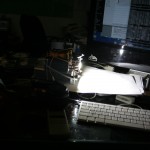
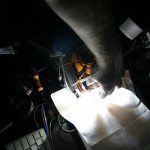
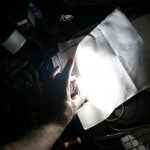
Some photos of that here –
The hokey CPU fan cooler hooked up to the back adds to the effect.
The LED comes in a variety of color temperatures, ranging from yellow white, pure white, through to blue white, we chose pure white, as thats closest to what they normally use in projectors.
Projector and fan came to about 400rmb including shipping. Seller was quite nice to deal with too, and advised us which would be best for the purpose.
Now that our lighting requirements were minimally in place, we looked at the next requirement.
LCD screens.
As the 2 or 3 people that read this blog are aware, I just bought some rather nice QXGA LCD’s. These would be quite nice to use for a projector, but, unfortunately, getting hold of controllers for them is a little bit harder than I thought it would be.
I did manage to find some, but the prices are a little high, so I put that on the back burner for now. I will be looking into that again in the near future though.
First, a little detour onto the subject of LCD’s.
Essentially LCD’s are mass produced these days by a small handful of manufacturers, and the controllers for LCD’s are also mass produced.
Controllers pretty much come in a few different capacities, but essentially they’re all the same featurewise.
You buy a controller based on the maximum resolution it can handle, then program it for the LCD you have.
Controllers are dirt cheap – most can be found for 20rmb low end eg SVGA, through to 120rmb for medium end – eg 1920×1200 /DVI+VGA.
This means that most laptop screens can easily be reused as desktop screens for reasonably cheap prices.
TV’s are also essentially exactly the same as screens now, so the hardware is exactly the same.
Controllers for TV are usually a little more expensive, but not overly so. I bought a multi-input (HDMI, VGA, Tuner etc) with USB for 200rmb.
Different chipsets do better jobs at HD, but its very very generic stuff these days.
You need an invertor board for the lighting (if its not an LED based LCD) – those go for 10-20rmb.
You need a controller card to drive the LCD. (Most sellers will make you a cable for your specific LCD, and program the controller for a minimal charge)
You need a power supply (typically 12v 3amps+-).
Lastly you need a case.
We gave this a test run with a salvaged a 14″ LCD from a hosed laptop.
We bought a controller board (20rmb), power supply + empty screen casing (130rmb) off taobao. While it wasn’t necessarily worth it to do that, we did learn that its fairly easy.
Programming controllers is also pretty straightforward, but I’ll probably expand on that in another post.
As I wanted an HD capable projector I looked at what the smallest size HD screen (WUXGA) available on the market today is – that happens to be the Samsung LTN154U1
I got mine for about 500rmb.
Most people will be wondering right now at this point how an LCD screen is going to be used in a projector.
Essentially LCD’s are transparent – an LCD screen typically comes sold ready to use. This means its shipped with lighting built in, plus a reflective back surface.
We’re going to need to denude the LCD off all that – I’m going to have to disassemble the LCD display, and take out all the non-essentials. What I’ll end up with will be transparent, and fairly delicate.
Hopefully I won’t break anything when I take the LCD out of the casing, and remove the lighting, backing etc. Breaking it will be costly!
Next we’ll need a way to shine our light source through the LCD.
While we have a strong light – it won’t be very useful as is, as the light will mostly be concentrated in the center of wherever its pointed at.
So, we need a way to disperse the light in a directed way.
Typically this is done with a Fresnel. Fresnels are rather cool lens typically made out of plastic. They magnify or reduce anything passed through them.
We’ll be using a fresnel in front of the LED light to disperse the light evenly through the LCD.
Once its through the LCD, we’ll be using another Fresnel to concentrate the light back into a smaller focal area, so that we can throw it through a lens, and see something on a screen.
For a 15.4″ screen, we need a 400×320 sized 330mm Fresnel, and a 500mm Fresnel.
The 330mm (aka our collimator) will be placed in front of the light source, the LCD will be placed 10-15mm in front of that, then finally the 500mm (aka our collector) to concentrate the light + display output into a nice ready to use focal area for our rather expensive triplet lens.
We’re using a 500mm triplet as the lens, mostly as all the projector websites are using those for 15.4″ screens.
Fresnels were fairly cheap – 80rmb each or so.
The lens was rather more expensive. Ours was close to 600rmb with shipping!
When it arrived, we saw why. It definitely feels like its worth the money.. Unfortunately ours arrived with a crack from shipping, so we had to send it back. The replacement should arrive in a day or three.
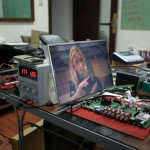
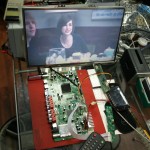
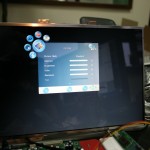
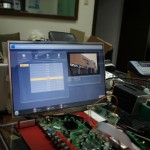
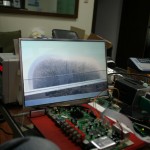
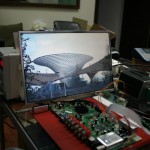
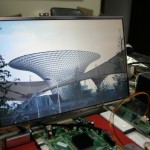
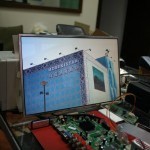
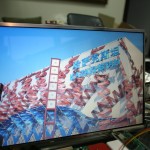
While I haven’t setup the fresnels yet in action, I did test out the controller board, and LCD.
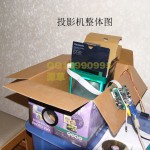
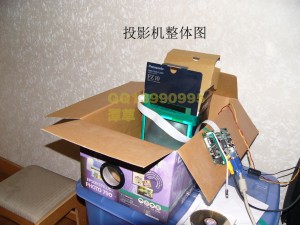
Photo’s below of everything.
While I haven’t built any casing yet, I’m fairly confident we should be able to knock something up quickly to house all the parts.
Hopefully ours will be sturdier than this professional build I saw online –
As someone I know was interested in getting a new (old) laptop, I did some trawling of the intertubes, and saw that there were quite a few IBM Thinkpad’s in nice condition available on Taobao.
After checking away the requirements (one of which was not to go down in resolution to the crap they sell nowadays), I decided on a T6x series.
A T60 with a 1400×1050 screen was about RMB2500 on Taobao with fairly decent spec’s – DVD Writer, Bluetooth, Fingerprint Reader, SATA, Extended Battery. 3 month warranty, with a replacement 7 day swap for another unit. I sent my staff to go take a look at the shop, they liked, and I was soon the owner of an ex-corporate laptop that looked like it came from Singapore originally (according to the model / software licence sticker on the laptop). It even came with a legitimate licenced copy of Windows.
As I had ordered one for test purposes to see what the quality was like, I was pleasantly suprised. The one I received is pretty much in mint condition. In fact its in such good condition, that I decided I would keep it for myself!
6
IP Cam Hacking – pt#6
I’ve uploaded a zip of my built test image here. I’ve only included telnetd, and ftpd, as the sshd binary is very large, and won’t fit into our rom image space!
If someone is willing to test, feel free.
Test Rom with FTPD and TELNETD binaries added
This rom is 700k+- vs the normal 550kb. So this may / may not overwrite the web ui.
As China’s firewall is being particularly obnoxious this week as to what I can view on the web, I can’t actually get to the info I need to see where they typically write the UI to in rom.
In theory, we should be able to write to the same base address via the boot loader.
The original rom is written here –
Image: 6 name:romfs.img base:0×7F0E0000 size:0×0008D000 exec:0×7F0E0000 -a
And I’m pretty sure that the UI gets written somewhere after this, and not as a separate image. I’d have to run Windows and a sniffer to test this though (using their firmware update software).
Our boot logs show that linux blkmem driver is set to view the whole area from 0×7F0E0000 through to 0x7F16D3FF, so we should easily have 200kb to waste^Hplay with.
From my boot logs:
Blkmem 1 disk images:
0: 7F0E0000-7F16D3FF [VIRTUAL 7F0E0000-7F16D3FF] (RO)
Obstensibly, this should be a matter of going to the bootloader over serial, then uploading our img file.
Suggest rename from testrom.img to romfs.img to be consistent.
It should be something like this:
bootloader > del 6
(delete the current romfs.img)
bootloader > fx 6 romfs.img 0x7f0e0000 0x7f0e0000 -a
Waiting for download
Press Ctrl-x to cancel … (while it waits, you have to select Transfer > Send File in Hyperterminal menu, choose the Xmodem protocol and select my rom image)
CCCCCCCCCCCCCCCCCCCCCCCCCCCCCCCC
Flash programming …
bootloader> boot
Then see what happens in the logs.
It should boot, then attempt to run telnetd and ftpd.
That probably WON’T work just yet, as they’ll complain about missing /etc/ config files.
You might also be missing the UI (as I think this gets written somewhere after our romfs.img in flash)
Send me the serial logs in the comments, and I can fix that up, and repackage.
I also know why the alleged clones (NB they’re not f..king clones sigh, they’re all made by 1 manufacturer here for different people, including FOSCAM) don’t work. The linux.bin for older firmware is set to boot from 0x7f0D0000 as opposed to 0x7f0e0000, so image 6 and 7 both need to be reflashed.
Also of note is that the newer units have gone cheaper, and use 2M flash, previous units had 4M.
uCLinux reports 8M, but its not talking about Flash, just RAM
Be prepared to brick (not completely, as we have a bootloader, and can reflash the original firmware) if it doesn’t work.
If my rom above doesn’t work initially for you, try flashing this linux.zip before reverting, and see if that helps it boot.
eg
bootloader> del 7
bootloader> fx 7 linux.zip 0x7f020000 0x8000 -acxz
Waiting for download
Press Ctrl-x to cancel ... (while it waits, you have to select Transfer > Send File in Hyperterminal menu, choose the Xmodem protocol and select my linux.zip)
CCCCCCCCCCCCCCCCCCCCCCCCCCCCCCCC
Flash programming ...
bootloader> fx 6 romfs.img 0x7f0e0000 0x7f0e0000 -a
Waiting for download
Press Ctrl-x to cancel ... (while it waits, you have to select Transfer > Send File in Hyperterminal menu, choose the Xmodem protocol and select my rom image)
CCCCCCCCCCCCCCCCCCCCCCCCCCCCCCCC
Flash programming ...
Why aren’t I doing this?
Mostly as I don’t currently have a good serial connection, I’m waiting on headers. Currently I have to hold the serial ports onto the board with fingers, and thats less than reliable!
I should get around to fixing that soonish though, I’m interested in testing this myself…
I’d also appreciate the French contingent adding some info. I’m particularly interested in paillassou’s board photos, and any other firmware people have found for these so I can compare.
I can’t get to Picasa, GadgetVictims, IrishJesus now in China. Grrr.
Yes, I know, use a VPN or proxy… Unfortunately what we do precludes doing so, as I’d probably get told off by our beloved government here, and thats not worth the risk…
Comments please.
30
IP Cam Hacking – pt#5
So far in this series, we’ve learnt a few things.
First, is that this hardware is quite nice for hacking purposes, as they’ve left the uBoot in a nice state, and have easily accessible debug ports.
Second is that doing this kind of thing isn’t really that complicated, and can be quite fun.
We’re pretty much ready to start doing our own coding, as we know how the images are packed, and we can use the uBoot to either flash onl the romfs on or own, or alternately roll a complete linux + romfs binary image.
For that, we’ll need to be ready to roll up our sleeves, and actually do some development (finally!).
Getting a development environment setup is our next step, as we’re ready to test out adding binaries.
I’m using Debian, but most Linux environments should be similar. OSX is BSD based, and more of a pain due to Apple not putting everything needed in the normal places, so I’m doing this in a VM on my Macbook under Debian.
Go grab a copy of “NUC700 Series MCU uCLinux BSP.zip” from here http://www.metavert.com/public/NO-SUPPORT/
Setup a VM for Debian (not going to cover that) or install Debian or similar.
Copy the zip file to /home in the OS you use.
cd /home

mkdir N745

cd N745

unzip ../NUC700\ Series\ MCU\ uCLinux\ BSP.zip
You should now see something like this:
:/home/N745/NUC700 Series MCU uCLinux BSP# ls -al

total 68

drwxr-xr-x 6 root root  4096 2009-05-15 20:02 .

drwxr-xr-x 3 root root  4096 2010-04-30 02:23 ..

drwxr-xr-x 3 root root  4096 2009-05-15 20:06 bootloader

drwxr-xr-x 2 root root  4096 2009-05-15 20:03 bsp

drwxr-xr-x 2 root root  4096 2009-05-15 20:02 doc

drwxr-xr-x 4 root root  4096 2009-05-15 20:02 mkrom

-r--r--r-- 1 root root 44632 2009-03-27 11:49 NUC700 uClinux BSP Release Note.pdf

debian:/home/N745/NUC700 Series MCU uCLinux BSP#
Unfortunately the build *really* doesn’t like long filenames, so lets move all this to the N745 folder, and get rid of the annoyingly named folder.
/home/N745/NUC700 Series MCU uCLinux BSP# mv * ..

/home/N745/# cd ..

/home/N745/# rm -r NUC700\ Series\ MCU\ uCLinux\ BSP/
We still need to unzip the BSP, as its compressed, so go into bsp
/home/N745/# cd bsp

/home/N745/bsp# tar -xzvf NUC700BSP.tar.gz

NUC700BSP/

NUC700BSP/arm_tools.tar.gz

NUC700BSP/install.sh

NUC700BSP/arm_tools_3.3.tar.gz

NUC700BSP/build.tar.gz

NUC700BSP/applications.tar.gz

NUC700BSP/uClinux-dist.tar.gz
Yay, yet another bloody subdirectory. Sigh.
/home/N745/bsp# cd NUC700BSP

debian:/home/N745/bsp/NUC700BSP# ls -al

total 183300

drwxr-xr-x 2 shanghaiguide shanghaiguide     4096 2009-03-26 22:38 .

drwxr-xr-x 3 root          root              4096 2010-04-30 02:29 ..

-rw-r--r-- 1 shanghaiguide shanghaiguide 29521418 2009-03-26 21:55 applications.tar.gz

-rw-r--r-- 1 shanghaiguide shanghaiguide 43742203 2009-03-26 21:22 arm_tools_3.3.tar.gz

-rw-r--r-- 1 shanghaiguide shanghaiguide 36108739 2009-03-26 21:11 arm_tools.tar.gz

-rw-r--r-- 1 shanghaiguide shanghaiguide  5643452 2009-03-26 21:24 build.tar.gz

-rwxr--r-- 1 shanghaiguide shanghaiguide     4370 2009-03-26 22:31 install.sh

-rw-r--r-- 1 shanghaiguide shanghaiguide 72439431 2009-03-26 20:53 uClinux-dist.tar.gz

debian:/home/N745/bsp/NUC700BSP#
Run the install – I’ve decided to install the whole shebang to /home/N745
Note – The observant amongst you will notice I’m running this as root.
This is NOT recommended. I’m running under a VM solely created to play with this, so I don’t really care if I break it (as I can roll back to the initial install image fairly easy in vmware). Don’t do this yourselves (unless you want to break things).
debian:/home/N745/bsp/NUC700BSP# ./install.sh

firstly install arm_tools.tar.gz -->/usr/local/

wait for a while

successfully finished installing arm_tools.tar.gz

now begin to install build.tar.gz,applications.tar.gz and uClinux-dist.tar.gz

Please enter your absolute path for installing build.tar.gz, applications.tar.gz and uClinux-dist.tar.gz:

/home/N745

/home/N745 has existed

please wait for a while, it will take some time

whole installation finished successfully!

debian:/home/N745/bsp/NUC700BSP#
We finally have our build environment unzipped, and its sitting in nuc700-uClinux.
debian:/home/N745# cd nuc700-uClinux/

debian:/home/N745/nuc700-uClinux# ls -al

total 24

drwxr-xr-x  6 root root 4096 2010-04-30 02:31 .

drwxr-xr-x  7 root root 4096 2010-04-30 02:31 ..

drwxr-xr-x  7 root root 4096 2009-03-25 00:44 applications

drwxr-xr-x  2 root root 4096 2009-03-26 21:23 image

drwxr-xr-x 12 root root 4096 2009-03-26 04:54 romdisk

drwxr-xr-x 10 root root 4096 2009-03-26 06:50 uClinux-dist

debian:/home/N745/nuc700-uClinux#
uClinux-dist has the default binaries we want, plus we need to configure the kernel, so lets visit there first (the more adventurous can look at the other folders)
debian:/home/N745/nuc700-uClinux# cd uClinux-dist/

debian:/home/N745/nuc700-uClinux/uClinux-dist# ls -al

total 84

drwxr-xr-x  10 root root  4096 2009-03-26 06:50 .

drwxr-xr-x   6 root root  4096 2010-04-30 02:31 ..

drwxr-xr-x   2 root root  4096 2009-01-22 23:27 bin

drwxr-xr-x   3 root root  4096 2009-03-26 06:50 config

-rw-r--r--   1 root root 18007 2009-01-22 23:29 COPYING

drwxr-xr-x   3 root root  4096 2009-01-22 23:27 Documentation

drwxr-xr-x  11 root root  4096 2009-01-22 23:29 freeswan

drwxr-xr-x   5 root root  4096 2009-01-22 23:29 lib

drwxr-xr-x  15 root root  4096 2009-03-26 06:50 linux-2.4.x

-rw-r--r--   1 root root  3228 2009-01-22 23:28 MAINTAINERS

-rw-r--r--   1 root root  7977 2009-01-22 23:27 Makefile

-rw-r--r--   1 root root  4935 2009-01-22 23:29 README

-rw-r--r--   1 root root  1654 2009-01-22 23:29 SOURCE

drwxr-xr-x 158 root root  4096 2009-01-22 23:28 user

drwxr-xr-x   4 root root  4096 2009-03-12 03:54 vendors

debian:/home/N745/nuc700-uClinux/uClinux-dist#
Looks like it should be fairly easy, right?
Wrong.
The default build doesn’t work. Why would it be that easy.
You’ll end up with issues like:
entry-armv.S:782: Error: Internal_relocation (type 210) not fixed up
(OFFSET_IMM)
entry-armv.S:784: Error: Internal_relocation (type 208) not fixed up
(IMMEDIATE)
So, we need to make sure we start off fresh.
Also, note that we’re building for an N745 cpu, so we’ll need to configure that at the make config stage.
Lastly, and EXTREMELY important, is that we’ll need to put our required tools in the path.
DO NOT FORGET TO DO THIS
sample PATH below:
PATH=/usr/local/sbin:/usr/local/bin:/usr/sbin:/usr/bin:/sbin:/bin:/usr/local/arm_tools/bin
debian:/home/N745/nuc700-uClinux/uClinux-dist# PATH=/usr/local/sbin:/usr/local/bin:/usr/sbin:/usr/bin:/sbin:/bin:/usr/local/arm_tools/bin
debian:/home/N745/nuc700-uClinux/uClinux-dist#make clean
Now we have a choice - Recommend use make xconfig if possible.
You need to have a GUI, and have tk installed. (apt-get install tk)
Otherwise run make config, and run through the tediously large amount of questions
OPTION#preferred
debian:/home/N745/nuc700-uClinux/uClinux-dist#make xconfig
OPTION#not recommended
debian:/home/N745/nuc700-uClinux/uClinux-dist# make config
config/mkconfig > config.in
#
# No defaults found
#
*
* Target Platform Selection
*
*
* Choose a Vendor/Product combination.
*
Vendor/Product (nuvoton/nuc710, nuvoton/nuc740, nuvoton/nuc745) [nuvoton/nuc710] (NEW) nuvoton/nuc745
[For the rest, I used the defaults (except for the Network Tools questions, which I said Y to all)]
Continue here from whatever menu (x)config you used.
debian:/home/N745/nuc700-uClinux/uClinux-dist#make oldconfig
[Needed, or compile doesn't work]
debian:/home/N745/nuc700-uClinux/uClinux-dist#make dep
[A gazillion pages of info later, we have a build environment!]
We’re finally ready to use our weapon of mass destruction.
debian:/home/N745/nuc700-uClinux/uClinux-dist#make

...
It should compile without issue.
Next step is to mount our created rom image, and copy the binaries off, or just go to the compiled folders, and get the binaries.
I’ve done this step already, and have a zip file of a few useful files ready.
-rwxr-xr-x 1 root root 110888 2010-04-30 03:50 ftpd
-rwxr-xr-x 1 root root 55164 2010-04-30 03:52 ping
-rwxr-xr-x 1 root root 1201904 2010-04-30 03:51 ssh
-rwxr-xr-x 1 root root 1219864 2010-04-30 03:51 sshd
-rwxr-xr-x 1 root root 118004 2010-04-30 03:45 telnet
-rwxr-xr-x 1 root root 45460 2010-04-30 03:45 telnetd
file *
ftpd: BFLT executable – version 4 ram
ping: BFLT executable – version 4 ram
ssh: BFLT executable – version 4 ram
sshd: BFLT executable – version 4 ram
telnet: BFLT executable – version 4 ram
telnetd: BFLT executable – version 4 ram
Download that here – arm7-nettools
All we need to do now is mount our romfs image, unzip the arm7-nettools.zip, copy the arm7 bFLT binaries over to bin, add telnetd, sshd, and ftpd to our /bin/init, and rebuild by running genromfs on our filesystem.
We can then finally flash our new romfs, and test it out.
Don’t forget that romfs is a read only file system, so we can’t modify it by mounting it. We need to mount, copying everything to elsewhere, do our required bits and pieces, then rebuild.
eg
mount -o loop -t romfs still_unsure.img /mnt/test -r
mkdir /mnt/new
cd /mnt
rsync -arv /mnt/test/ new
cd new/bin
wget http://www.computersolutions.cn/blog/wp-content/uploads/2010/04/arm7-nettools.zip
unzip arm7-nettools.zip
rm arm7-nettools.zip[We need to also edit init]
pico initAdd
sshd&
telnetd&
ftpd&eg –
cat init
mount -t proc none /proc
mount -t ramfs none /usr
mount -t ramfs none /swap
mount -t ramfs none /var/run
mount -t ramfs none /etc
mount -t ramfs none /flash
mount -t ramfs none /home
camera&
sshd&
telnetd&
ftpd&
shChange to the next directory up, and lets run genromfs
genromfs -d new -f testrom.img
debian:/mnt# ls testrom.img
testrom.img
debian:/mnt# ls -al testrom.img
-rw-r–r– 1 root root 3329024 2010-04-30 04:18 testrom.imgIn theory, this should be usable (famous last words!).
Unfortunately, I can’t try testing on that at home, as all the equipment is at the office, but that should be fairly easy.
Probably also some small config issues to sort out, as ftpd, telnetd and sshd will probably choke without their related /etc/whatever config files needed, but we can sort that out via serial on the debug ports.
Archives
- November 2024
- November 2019
- October 2019
- August 2019
- April 2019
- February 2017
- September 2016
- June 2016
- May 2016
- September 2015
- August 2015
- June 2015
- April 2015
- December 2014
- October 2014
- September 2014
- July 2014
- June 2014
- April 2014
- October 2013
- July 2013
- May 2013
- April 2013
- March 2013
- January 2013
- December 2012
- October 2012
- August 2012
- July 2012
- June 2012
- May 2012
- April 2012
- March 2012
- December 2011
- November 2011
- October 2011
- September 2011
- July 2011
- May 2011
- April 2011
- March 2011
- February 2011
- January 2011
- December 2010
- November 2010
- October 2010
- September 2010
- August 2010
- July 2010
- June 2010
- May 2010
- April 2010
- March 2010
- February 2010
- January 2010
- December 2009
- November 2009
- October 2009
- May 2009
- April 2009
- March 2009
- February 2009
- January 2009
- December 2008
- November 2008
- October 2008
- September 2008
Categories
- Apple
- Arcade Machines
- Badges
- BMW
- China Related
- Cool Hunting
- Exploits
- Firmware
- Food
- General Talk
- government
- IP Cam
- iPhone
- Lasers
- legislation
- MODx
- MySQL
- notice
- qmail
- requirements
- Reviews
- Service Issues
- Tao Bao
- Technical Mumbo Jumbo
- Things that will get me censored
- Travel
- Uncategorized
- Useful Info

